Private: Creative Gardens: Thinking Outside the Garden Box
Think outside the box with creative container gardens and take a step into gardening.
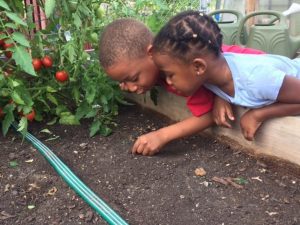
Read More Gardening is one of the best ways to encourage healthy eating among children. Active involvement in the growing and harvesting of their food can help kids develop more positive attitudes towards fresh fruits and vegetables, allowing them to better recognize preferences and increase their willingness to try new foods. Gardening helps children realize that their actions have consequences both good and bad and lead to greater understanding of cause and effect. It also helps them learn responsible decision making, as they watch something they took care of grow, leading to a feeling of accomplishment and self-worth.
If outdoor gardening appears to be a challenge – whether due to space, climate or something else – you can grow indoors with items right in your own kitchen!
Use your imagination. Before jumping into any project, it’s important to gather everything you need to be successful and create a plan. Gather tools, soil, and get creative with containers you have on hand. Don’t let limited space stop you from exploring a green thumb. Indoor or patio gardens not only are a fun way of bringing the outdoors in… they also serve as awesome houseplants and a science lesson all in one.
Start with scraps. Don’t toss it – plant it! Many of the scraps left over from fruits and veggies are all that’s needed to get an indoor garden started. Plus, it’s a simple step towards creating a greener (eco-friendly) home by cutting down on food waste!
Which scraps grow the best? There are many veggies that can grow from the top, seeds or base with just a little bit of water. Children will be amazed to watch something often tossed in the trash take root and turn into something they recognize and can later replant (again!) or eat.
These are just a few – take a look at what vegetables you have on hand and find out their growing possibilities!
You can sow your own seeds…no packs needed. Growing a garden from seeds is a fun and easy way to understand the life cycle of a plant and all the necessary ingredients needed to grow – sunlight, water and a little TLC. Simply pull some of the seeds from a tomato or pepper scrap in the kitchen and plant. Be sure to use a potting soil mix made from peat moss (or coco peat), vermiculite, and/or perlite. Some mixes also contain added nutrients in the form of slow-release fertilizer or mineral amendments, and these can work just as well. Use a container that has good drainage and find a sunny location.
Reach new heights with the beginnings of a tree. While these take a little longer, some seeds from kitchen scraps can be germinated and over time grow into fruit bearing trees!
You can follow a similar process with apple, peach, lemon and cherry seeds. Depending on the climate where you live, over the years your tree might begin to bear fruit! If not – that’s okay. It’s just as fun tending to its growth and seeing your hard work pay off with new life.
Choose seeds or items that are adaptable and fast growing. Little minds aren’t always the most patient. Beans are a great to start a garden, as they take off quickly.
Remember to protect your windowsills or wooden tables near windows from water damage. Use individual saucers for your pots or large plastic tubs or bins.
Use books or other resources to tie the gardening experience into the growing process. Allow children to document their observations with a journal of drawings or words to describe what they are seeing.
Herbs are great for growing indoors and don’t need to be moved outdoors. Basil, chives, parsley, mint and rosemary are all easily grown, started, and continued indoors. These are great for locations that don’t have a lot of room outdoors or opportunity to grow outside due to weather conditions or lack of space.
Get cooking in the kitchen with your harvest! Try out a new recipe or find ways to incorporate into some of your favorites.
For more activities and ideas like this one, be sure to sign up for our news and updates. And if you like what you see, please donate to support our work creating more ways to help build a healthier future for kids.
Categories: Nutrition & Healthy Eating, At Home, At School, Digital Resource